• Jun, Fri, 2022

FortiGate Local User & Group Authentication

Authenticating Local Users and Groups with FortiGate

Local User and Groups Authentication in FortiGate FW

FortiGate local user and group authentication is a powerful security feature that can help protect your network from unauthorized access. It allows you to create and manage local user accounts and groups, and assign them specific privileges and access rights. This ensures that only authorized users can access your network resources and that they can only do so in accordance with your security policies.

By using FortiGate local user and group authentication, you can ensure that only authorized users can access your network resources, and that they can only do so in accordance with your security policies. This helps to protect your network from unauthorized access and ensures that your data remains secure.


Create Local Users LocalUser01 and LocalUser02
FortiGate Local User & Group Authentication
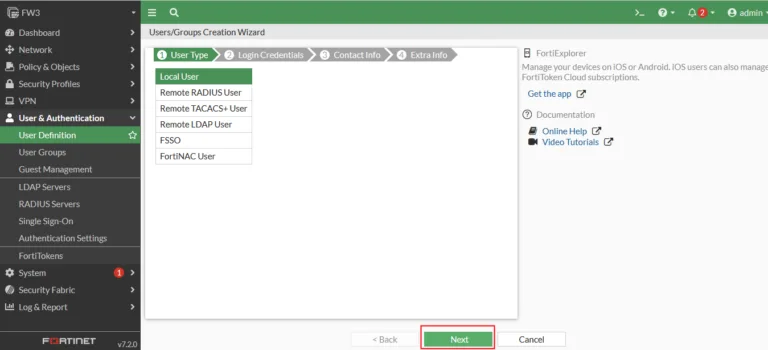
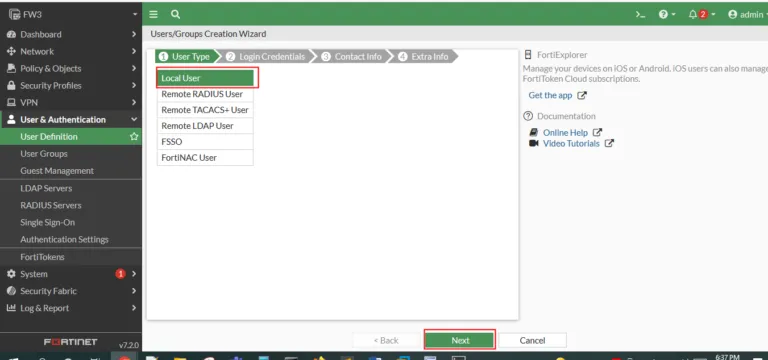
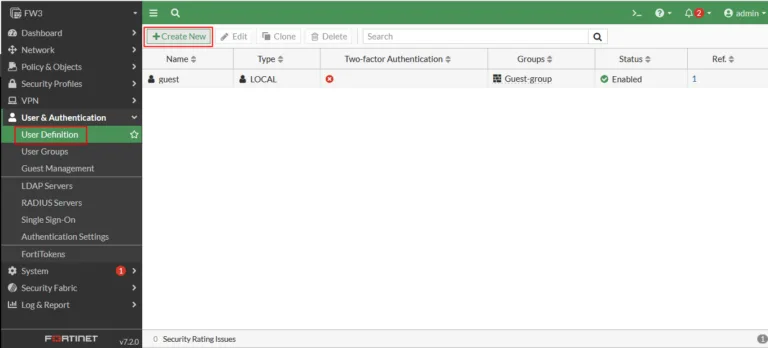
Create two local users02
Create two local users03
Create two local users04

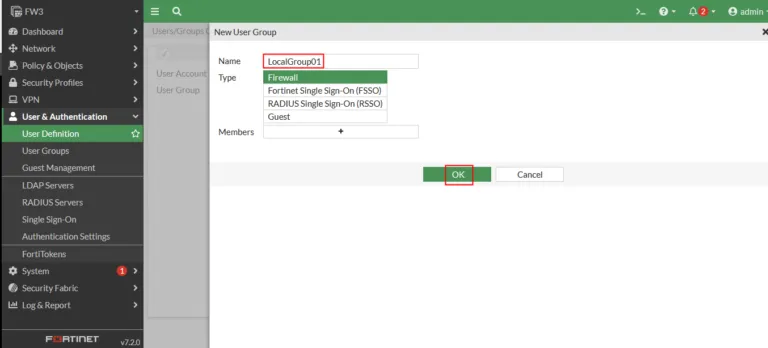
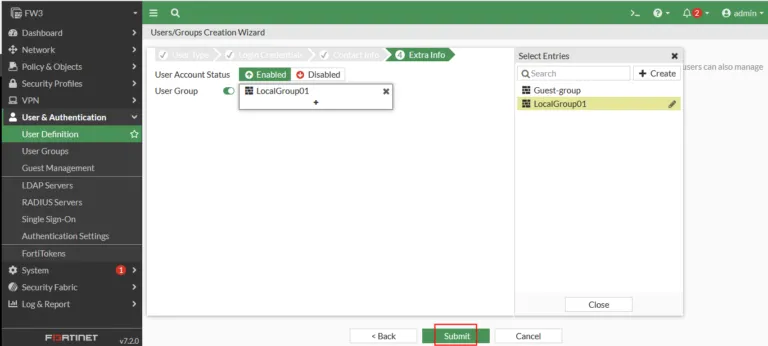
Create a local group called LocalGroup01 and add both users to it.
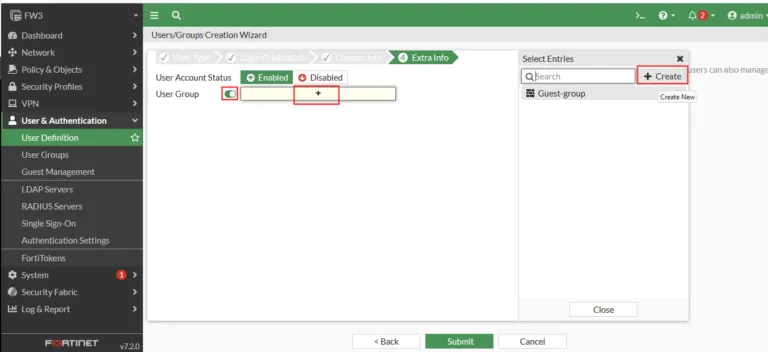
Create two local users05
Create two local users06
Create two local users08
Create two local users09

Click on the Firewall Policy rule, then click Source. Additionally, any user must be a member of the local group created in order to allow traffic (HTTP, HTTPS, SSH, FTP) through the Firewall after providing the correct username and password.

Create two local users10

On the client machine, the IP address is 10.10.0.13 (DHCP enabled on FW) and the GW is 10.10.0.1 (FW itself).

FortiGate will check its internal database to confirm the identity of the user.

Create two local users11

If you try to access a website, you may be prompted to provide authentication.

Create two local users12

In Dashboard > Users and Devices, it’s showing a firewall user.

Create two local users13

You can select that user and click on de-authenticate which will force that user next time to re-authenticate to gain internet access.
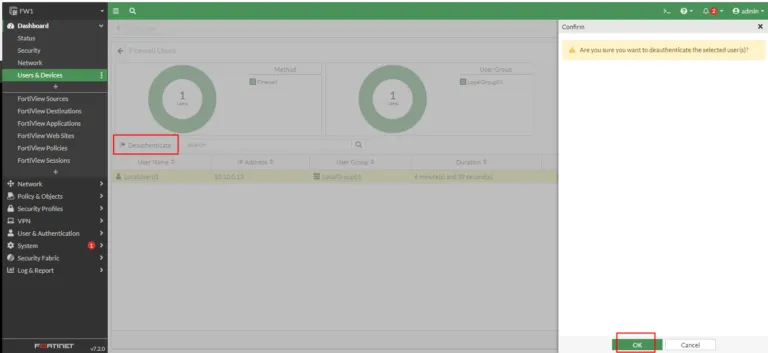
Create two local users14

  • May, Sat, 2022

How to configure DHCP relay on FortiGate FW (Photos)

How to Configure DHCP Relay on FortiGate FW (Photos)?

  • DHCP (Dynamic Host Configuration Protocol) is a network protocol used to automatically assign IP addresses and other settings to devices on a network.

  • As networks grow, it becomes increasingly difficult to manage and configure each device manually. To address this problem, most companies use DHCP Relay instead of including a DHCP server on every subnet. By enabling DHCP relay, one DHCP server can support multiple subnets and simplify the configuration process. This helps reduce administrative overhead and allows for more efficient management of IP addresses across the network.
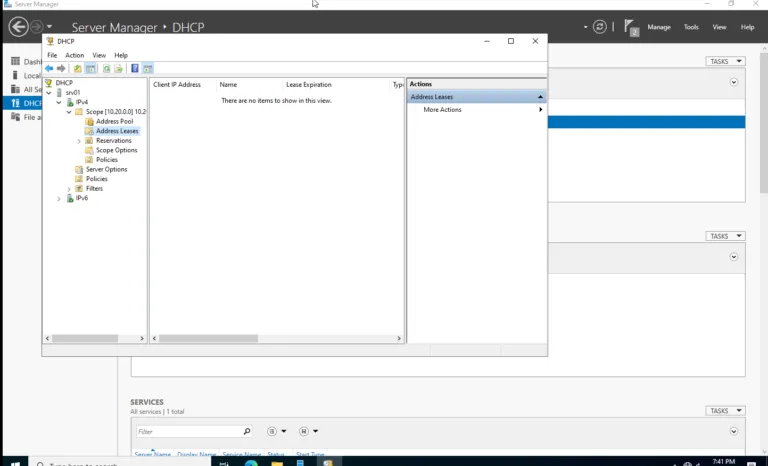
On windows Server 2022, install DHCP service

network1
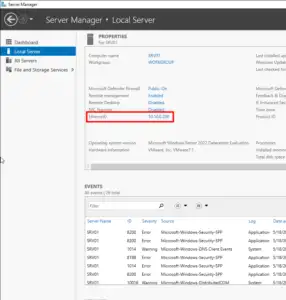
Server IP address
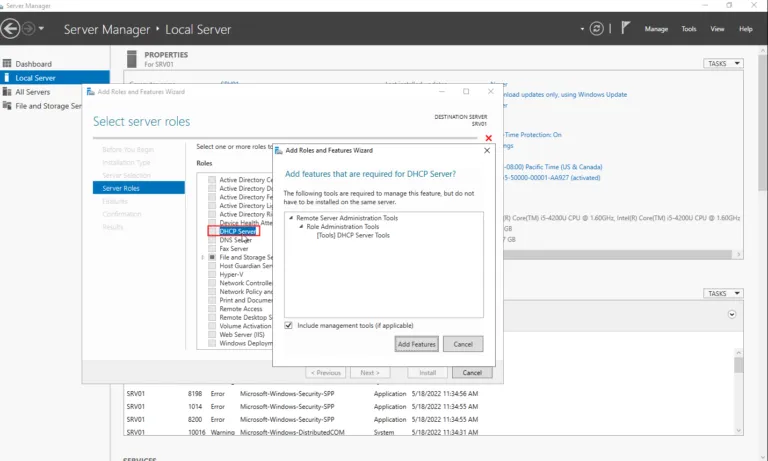
Add DHCP Role
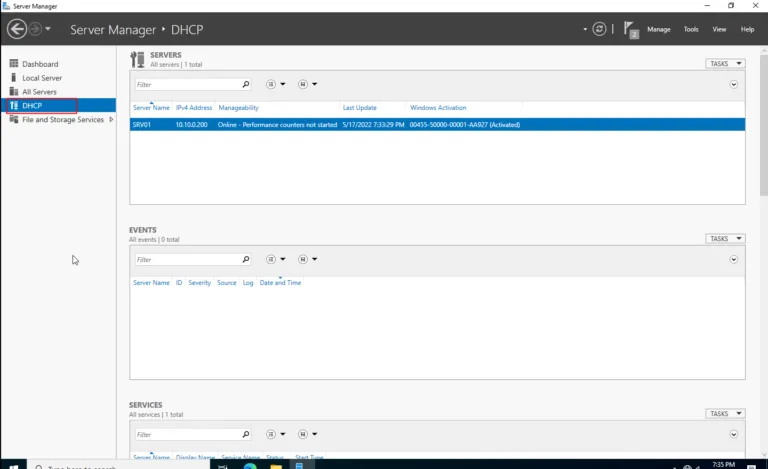
DHCP
DHCP Installed

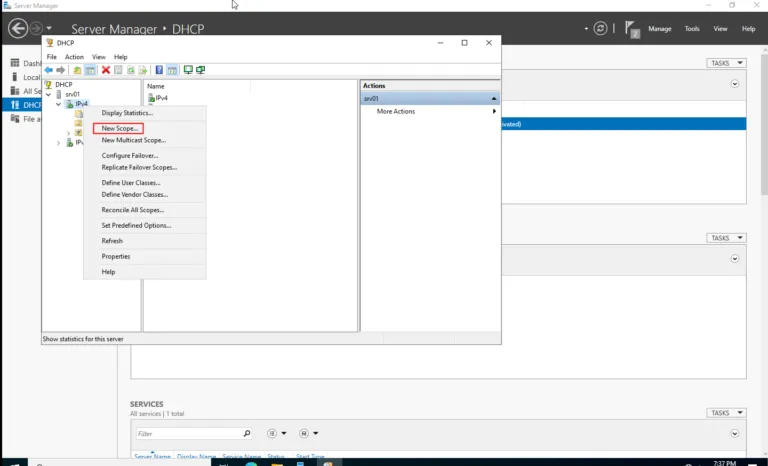
Right-click on IPv4 and create a new scope.

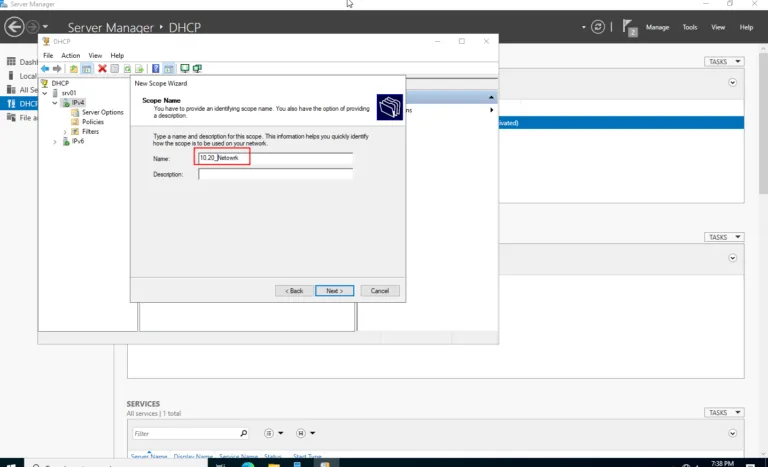
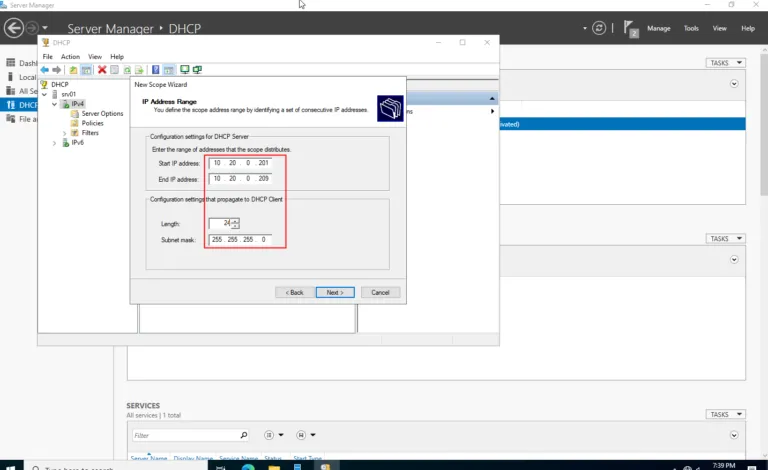
new scope
1 1
2
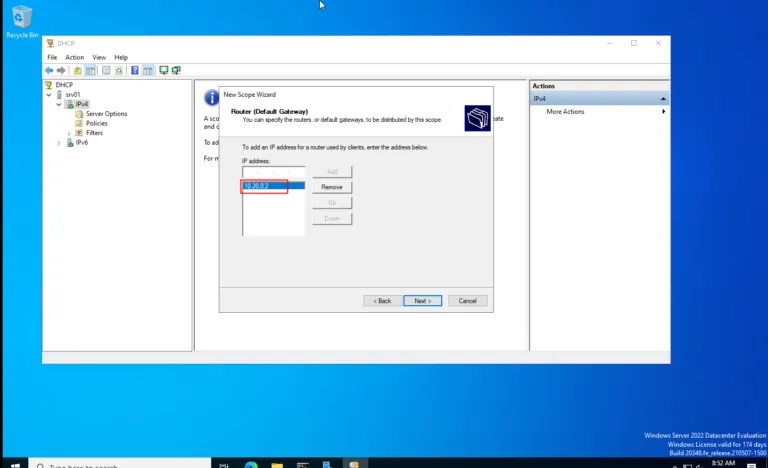
Gateway IP
5

FW2 

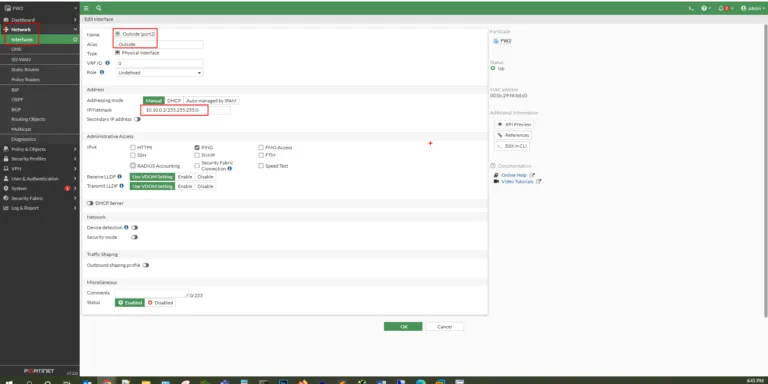
Configure the interfaces (inside and outside) on Fortigate FW.

click on DHCP server > Advanced > Relay > IP address of DHCP Server (10.10.2.200).

FW2 interface_inside
FW2 interface outside
FW1 interfaces

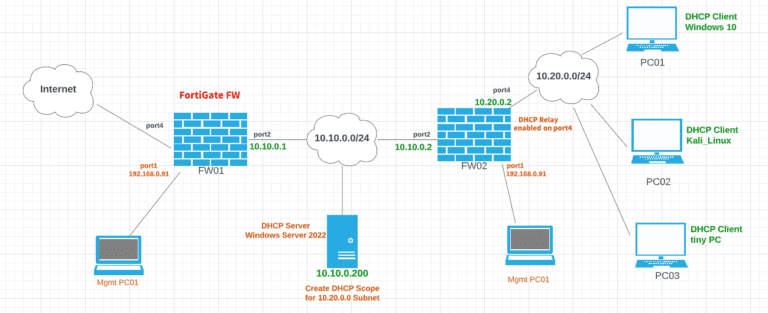
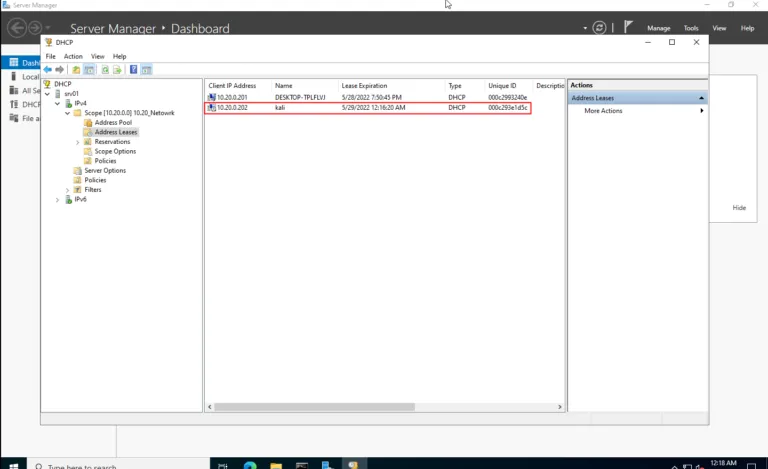
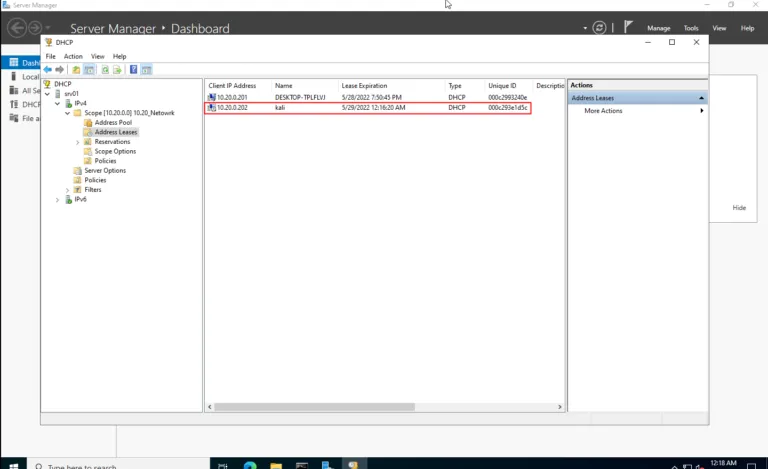
FW2 can reach DHCP Server 10.10.0.200 which has the scope for 10.20.0.0 network.

FW2 ping DHCP Relay

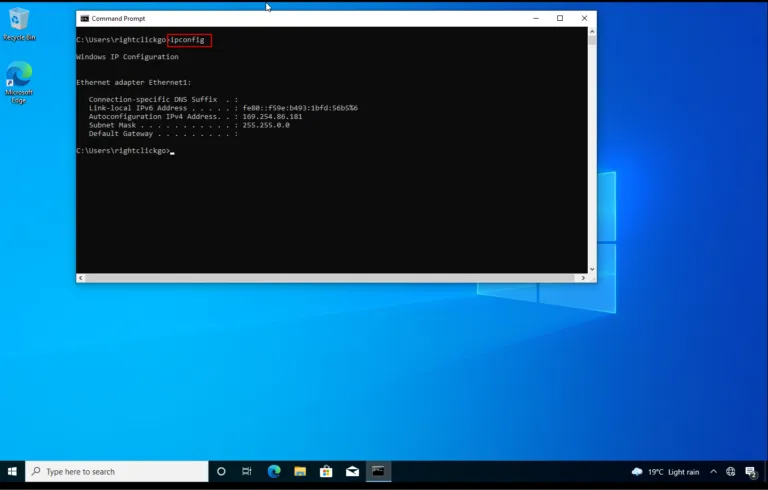
on Windows 10 client machine which configured as DHCP client (Before DHCP Relay).

no IP

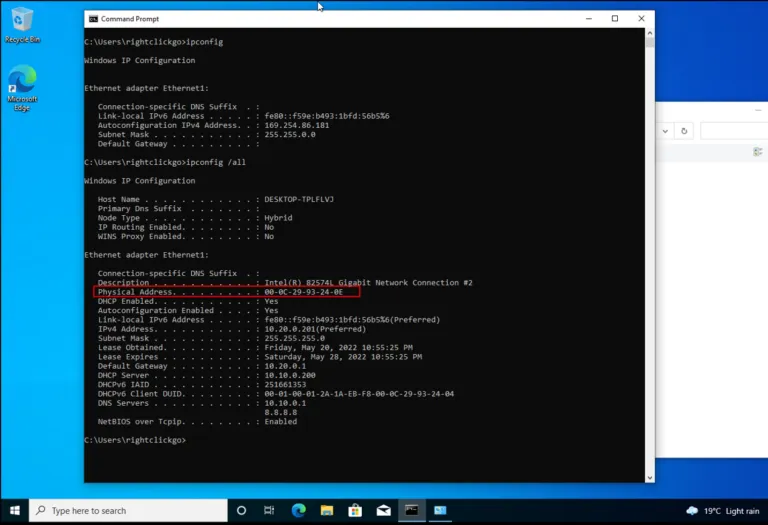
On Windows 10 client machine(After DHCP Relay).

with IP
kali-linux

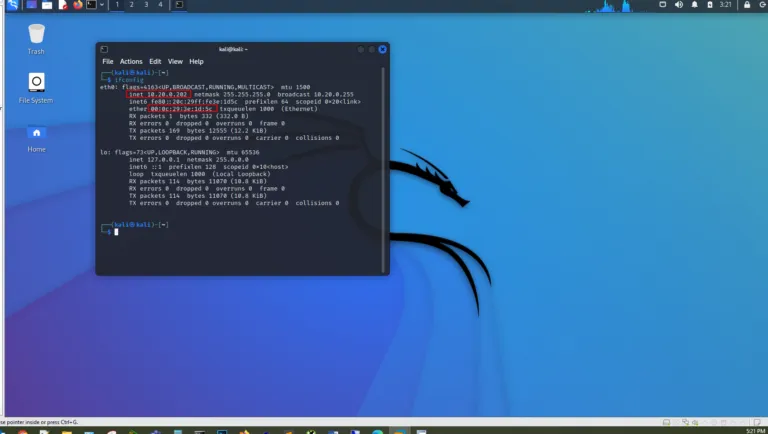
On Kali-Linux Client

Kali IP
kali-linux on scope

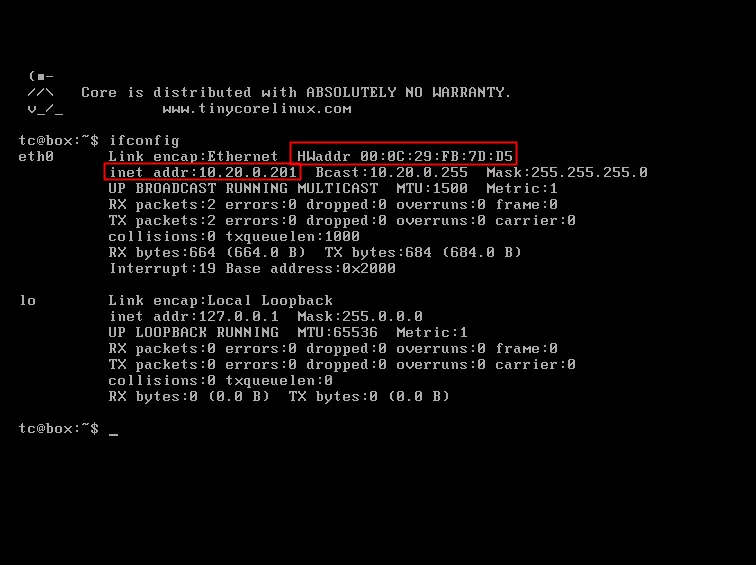
PC3, 

PC3 DCHP Client
PC3
PC3 internet

Check out, configure RIP routing protocol
  • May, Sat, 2022

FortiGate VM Trial license not working

Troubleshooting a FortiGate VM Trial License: A Step-by-Step Guide to Resolving the Issue

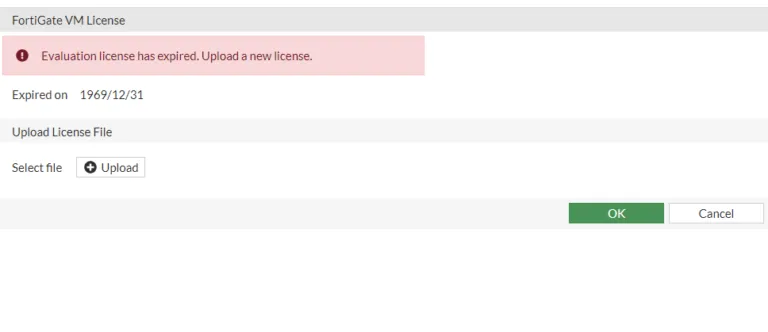
If you have been having trouble getting a FortiGate VM Trial license to work, then you are not alone. Many users have encountered this issue and have found it difficult to resolve. Fortunately, this article will provide you with the steps necessary to get your VM Trial license working properly. We will discuss the necessary steps for activating and validating your FortiGate VM Trial license as well as troubleshooting any issues that may arise during the process. By following these instructions, you should be able to get your FortiGate VM Trial license up and running in no time.
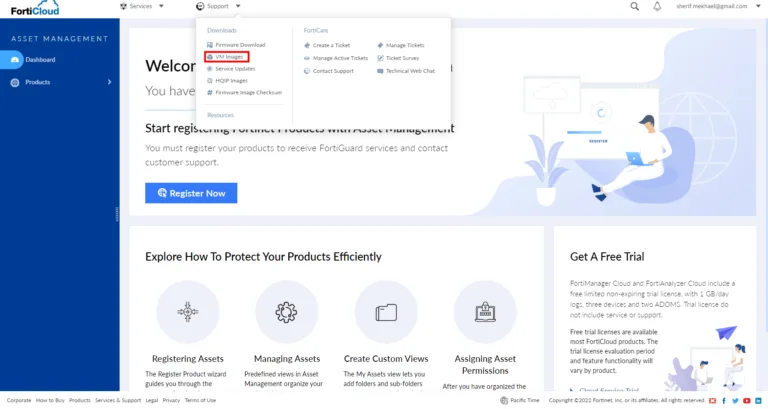
download-vm images
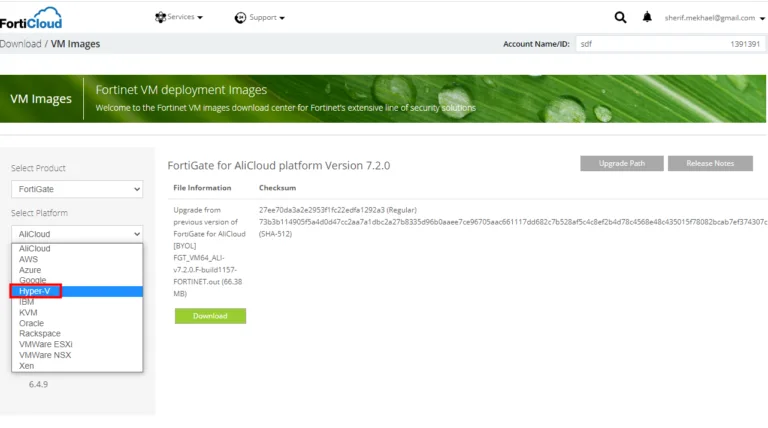
select Hyper-V
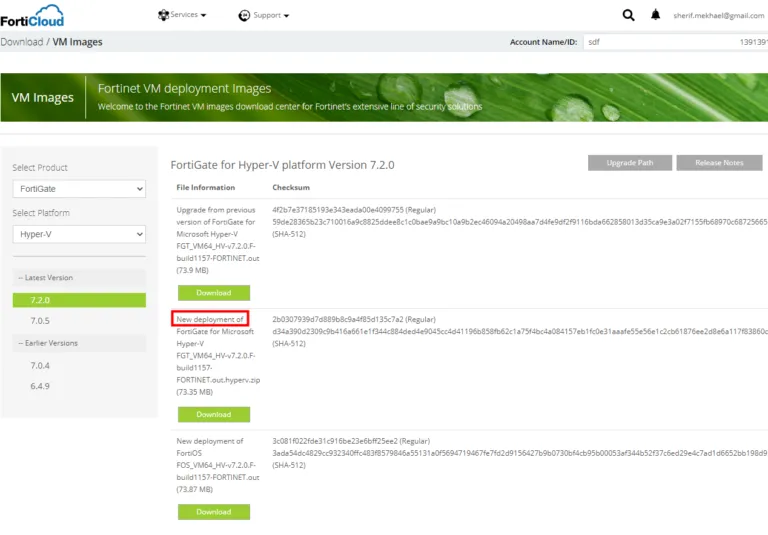
new-deployment
FortiGate VM Trial license not working

Understanding the FortiGate VM Trial License Limitations

Before troubleshooting, it’s crucial to understand the limitations of the evaluation license. The FortiGate Trial license does not support HTTPS for management, which means that you would have to manage it via HTTP.

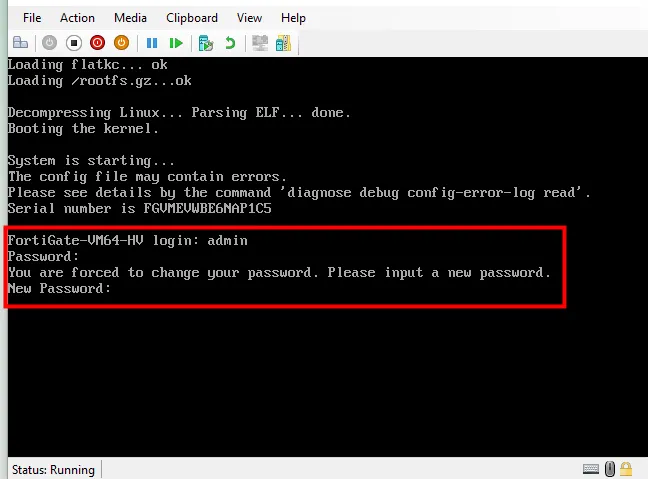
Moreover, when the Fortigate default login is used, which is the admin, no password is required. After pressing enter, the firewall system forces you to set up a new password for better security.

FortiGate_default username and password

Diagnosis: Identifying the VM License Issue

Often, the problem begins with your FortiGate VM trial license not working as expected.

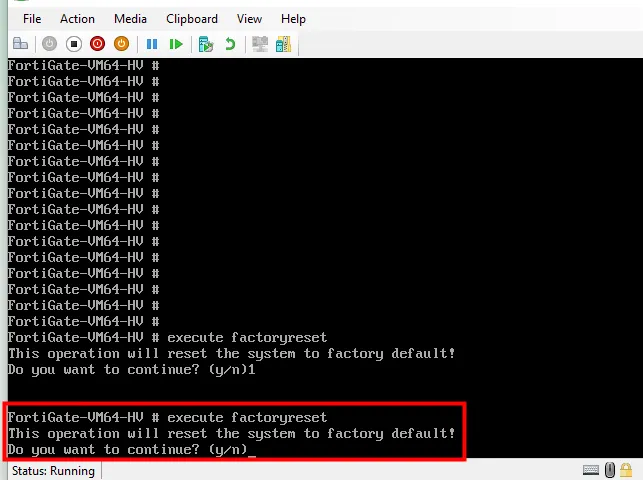
To troubleshoot this, enter #execute factoryreset then type y. This action is aimed at restoring the factory settings and fixing the VM license issue.

FortiGate_FactoryReset
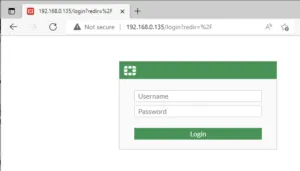
FortiGate Login

Setting up the initial configuration of a FortiGate Firewall.

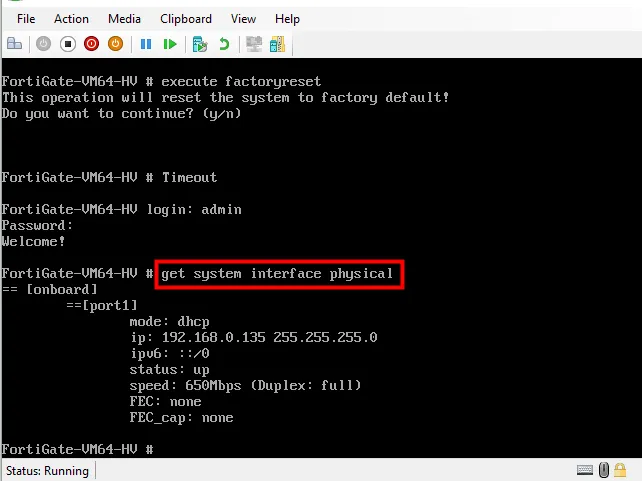
To show the current IP address and the mode

#get system interface physical

IP_DHCP

Configuring Network Settings

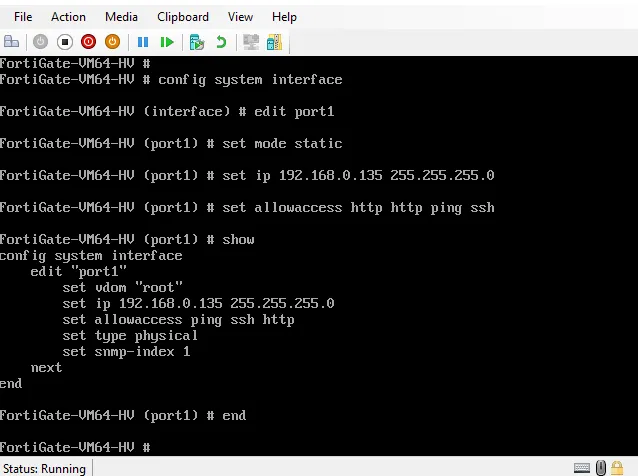
Next step: switch your network configuration to static and enter the IP address manually. Use the commands below to achieve this:

#config system interface

#show

To edit (configure) certain port number

#edit port1

#set mode static

#set ip 192.168.0.135 255.255.255.0

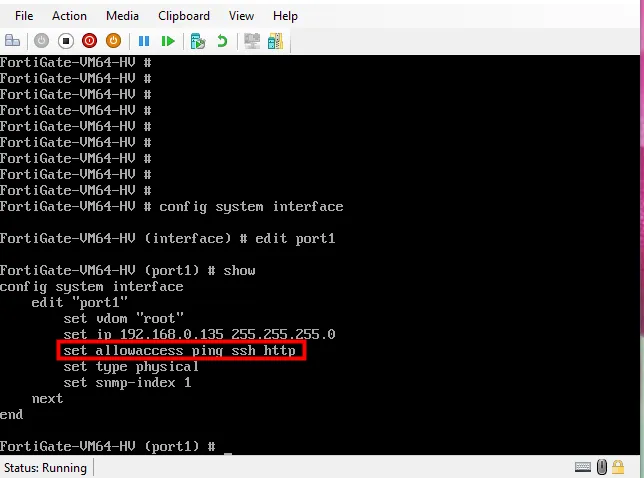
To access the firewall through that port, you must enable HTTP (included with the evaluation license). Upgrading to the full version will give you the added benefit of accessing the firewall via HTTPS and SSH as well.

The command for this is:

#set allowaccess http ssh ping https

change IP to static
mode:static
allowaccess

Setting up Internet Access and DNS Serve

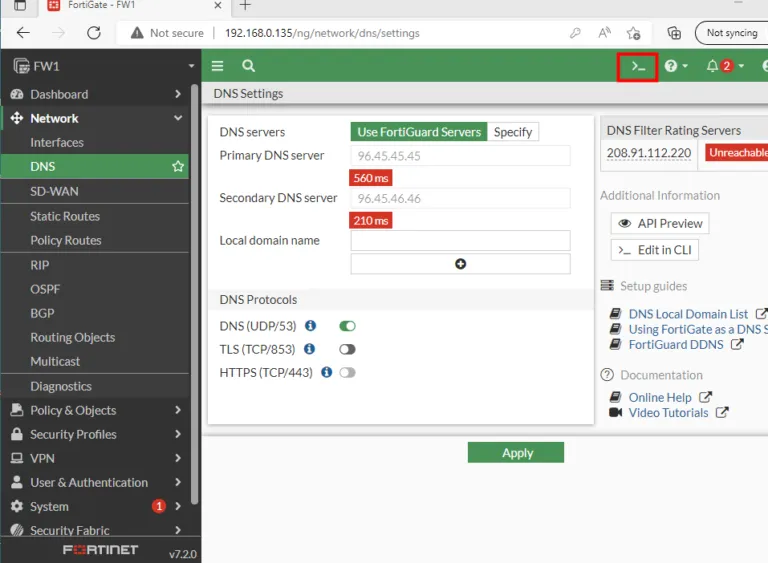
By default, the system utilizes Fortinet’s DNS servers. However, you have the flexibility to modify the DNS settings if required.
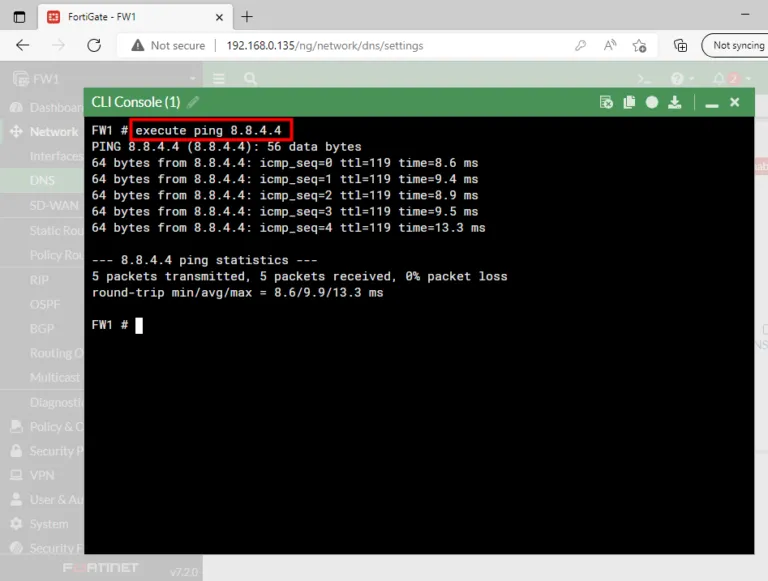
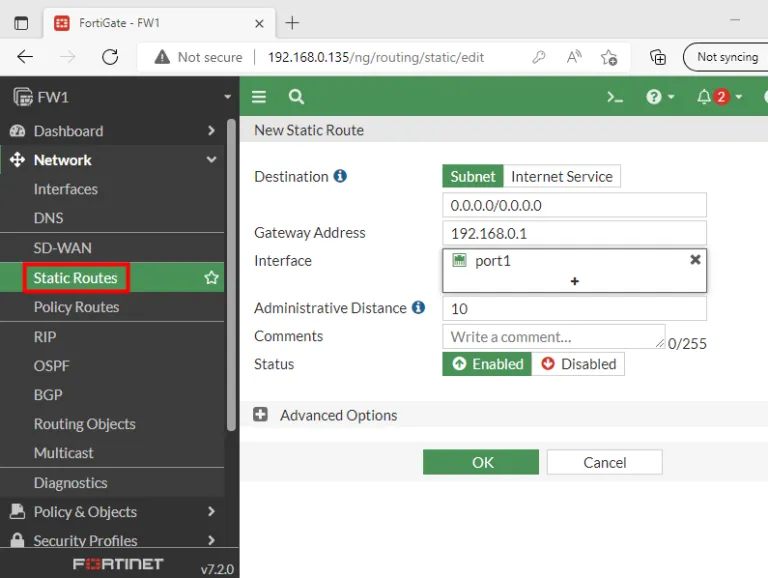
You need to set up a static default route to get an internet access route.

Network > Static Routes

By default, Fortinet’s DNS servers are being used, but you can alter the DNS settings if desired.

You can launch a new console window from the graphical user interface (GUI).

Concluding thoughts

Finally, it is important to note that a new console window can be launched from the graphical user interface (GUI) for more convenience.

In the end, while the FortiGate VM Trial license has its limitations, understanding and working around these constraints can allow you to explore the robust benefits of FortiGate VM and eventually make an informed decision about upgrading to the full version.

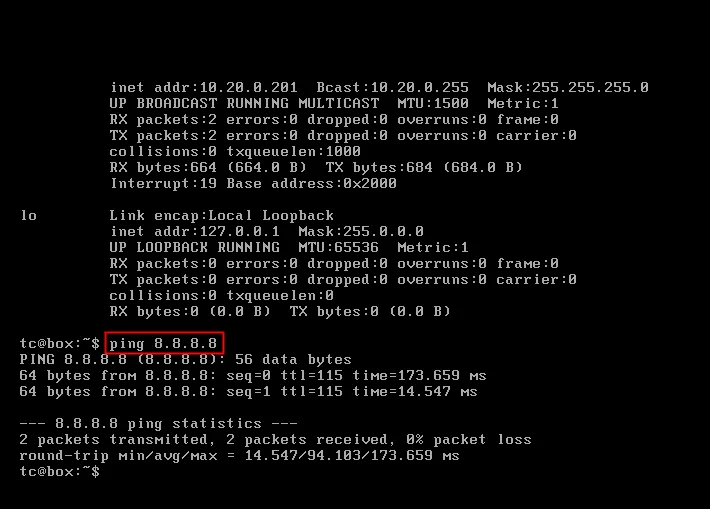
internet_access
DNS
console