Hyper-V Nested Virtualization
Steps to Enable Hyper-V Nested Virtualization
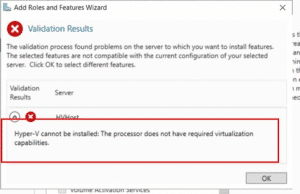
Hyper-V Nested virtualization is a feature that allows you to run Hyper-V inside of a Hyper-V virtual machine (VM). This feature requires the processor to have certain virtualization capabilities, and if the processor does not have these capabilities, you will get the error “the processor does not have required virtualization capabilities”.

This is usually because the processor does not support hardware virtualization, or the BIOS settings have not been enabled to allow virtualization. To fix this, you will need to enable hardware virtualization in the BIOS settings or upgrade the processor to one that supports virtualization.
This error indicates that your processor does not have the necessary virtualization capabilities, such as Intel’s VT-x technology or AMD’s EPYC/Ryzen processor, to enable the performance and security benefits of modern virtualization products.
- The Hyper-V guest that you want to install Hyper-V on must be running configuration version 8 or later.
- The Hyper-V guest must be Windows Server 2016 (or later) / Windows 10 (or later).
- VM guest must be off when you enable this capability.
- On the guest machines, you do not have dynamic memory capabilities, only on the host machine.
Enable Nested Virtualization (on Host Machine)
Set-VMProcessor -VMName VMHost -ExposeVirtualizationExtensions $true
The Set-VMProcessor cmdlet is used to configure the processor settings of a virtual machine. The -VMName parameter specifies the name of the virtual machine to configure. The -ExposeVirtualizationExtensions parameter specifies whether to expose virtualization extensions to the virtual machine. When set to $true, the virtual machine will be able to access the virtualization extensions.
Then start VM and install Hyper-V (VMHost does need to restart).
Disable Nested Virtualization
Set-VMProcessor -VMName VMHost -ExposeVirtualizationExtensions $false
