Step-by-Step Guide to Configuring RIP Routing on FortiGate
What steps are needed to set up RIP routing on a FortiGate device (with Photos)?
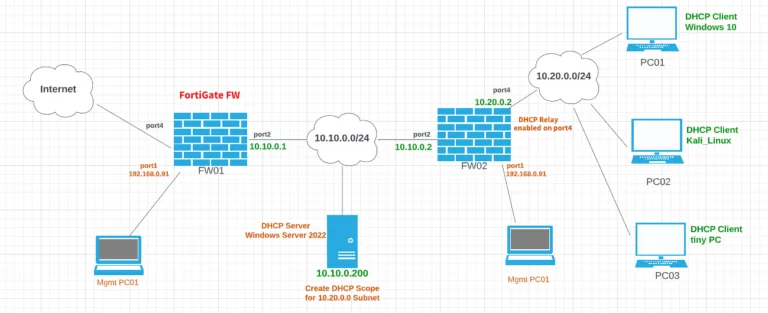
Dynamic routing protocols are used to automatically exchange routing information between routers in a network. They are used to find the best path for data to travel from one network to another. Examples of dynamic routing protocols include Open Shortest Path First (OSPF), Border Gateway Protocol (BGP), Enhanced Interior Gateway Routing Protocol (EIGRP), and Routing Information Protocol (RIP).
RIP (Routing Information Protocol) is a network routing protocol used to determine the best path for data to travel across a network. It is used to exchange routing information between routers and is supported by most modern devices. Version 1 and Version 2 of RIP are the two versions available, with Version 2 being the most widely used.
If you have an older device that only supports RIP, you may want to consider using RIP as your dynamic routing protocol.
In RIP routing, each device will broadcast information about the networks connected to its interfaces to its neighboring devices.
FW1 is going to advertise 10.10.0.0/16 Network.
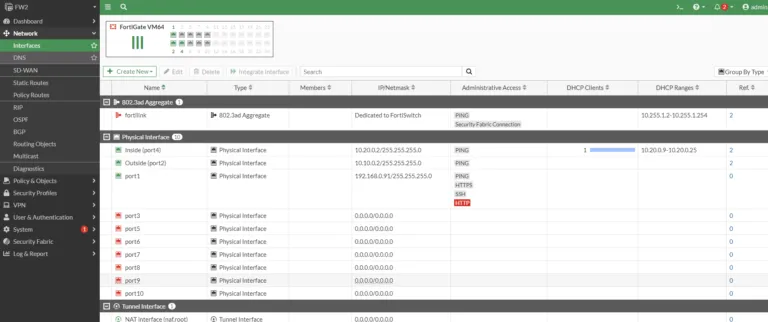
FW2 is going to advertise 10.10.0.0/16 and 10.20.0.2/16.
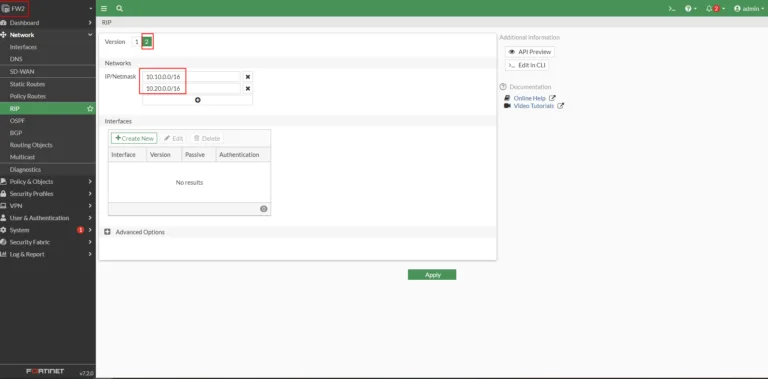
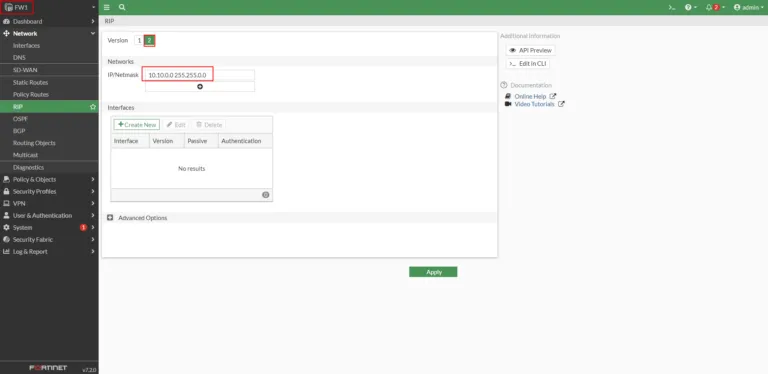
click on Dashboard > Network > Routing

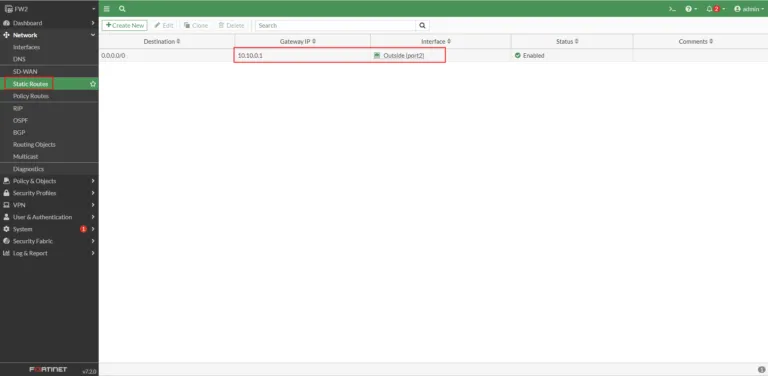
on FW2 > configure static route

ping 8.8.8.8 from PC03

Follow these steps to configure RIP on a Fortigate Firewall.
- Log into the FortiGate web-based manager.
- Go to Network > Static Routes and select Create New.
- Enter a name for the route.
- Select RIP as the routing protocol.
- Enter the destination network and subnet mask.
- Enter the gateway IP address.
- Select the interface that will be used for the route.
- 8. Select the administrative distance for the route.
- Select the metric for the route. 10. Select the RIP version.
- Select the RIP authentication type.
- Select the RIP authentication key.
- Click OK to save the route.
